Home > software_development > How to Get Started with Front-End Development for Beginners: A Step-by-Step Guide.
How to Get Started with Front-End Development for Beginners: A Step-by-Step Guide.
This guide will teach you the step-by-step process of front-end development.
By :Thomas Inyang🕒 5 Oct 2024
Frontend development is not as difficult as you think. It's a sequential step that must be followed, from understanding the concept, roles, design, tools, and development, to deployment. If you are consistent, you'll progress from a beginner to a junior front-end developer in no time.
Introduction:
As a beginner who wants to start a front-end development career, it is important to be exposed to the basics of front-end development and the tools needed to build your first webpage.
In this post,
- You will be acquainted with the term front-end, the roles of a front-end developer, and the needed skills.
- You will build your first webpage (about yourself) using the skills to kick-start your front-end developer career.
Prerequisite
To get started in your front-end development path, you'll need:
- A Personal Computer.
- Install NodeJs
- Install Visual Studio Code code editor.
- Have a web browser (Google Chrome or any other.
What is Front-End Development?
Front-end development is the process of developing a website design into a static or dynamic website with tools like HyperText Markup Language (HTML), Cascading Style Sheet (CSS), and Javascript. These tools are used to develop the User Interaction and User Experience (UI/UX) of a website.
What Are The Roles of a Front-End Developer?
The roles of a Web Developer are not limited to the following.
- To develop user-friendly web pages in markup languages like HTML, CSS, and Javascript.
- Ensures the website is optimized for speed, Search Engine Optimization (SEO) ready, performance, and continuous maintenance.
- Develop responsive websites to fit into all screen sizes.
- Collaborate with backend developers and web designers to improve usability
- Receive feedback from other team members and clients.
- Write functional and reusable components, documents, and guides.
- Help backend developers with coding and troubleshooting.
- Stay up-to-date on emerging technologies
Being proficient in these roles will make you stand out among other front-end developers.
Having known the roles, you'll need to acquire basic front-end development skills.
The Basic Frontend Development Skills
The following are basic front-end development skills:
HTML (HyperText Markup Language)

This is the standard markup language for developing documents designed to be displayed in a web browser. It shows the content and structure of the web content.
HTML can be seen as the structure of a website and its entry semantics consist of the following tags, <!DOCTYPE html>, <html>,<head>,< title>, and <body>. These tags are the superset tags that tell the web browser about the HTML file.
Other semantic tags are used for structuring the HTML file which are placed in the <body> </body> tag:
- a for anchor (links) and written as <a> content </a>.
- h1 to h6 for Headings and written as <h1> content </h1>.
- img for images and written as <img src="image url" alt=" title for the image" height and width/>.
- p for paragraph and written as <p> content </p>.
- ol for ordered lists and written as <ol><li>content</li></ol>.
- ul for unordered lists and written as <ul><li>content</li></ul>.
- video for videos and written as <video height, width, controls> <source src= "content.mp4" type=" video/mp4> </video>.
- strong for bold and written as <strong> content </strong>.
- div, span, main, article, section, aside, nav, etc are important and used to make a website ready for SEO crawling.
These tags are used to render the content to be displayed. Having HTML knowledge is the basic skill for building your first website.
CSS (Cascading Style Sheets)

CSS is a stylesheet language that describes the presentation of an HTML or any XML document. It specifies how elements should be shown mostly on screen or in other mediums, and It can control the layout of multiple web pages all at once. With CSS, you can take charge of how HTML elements appear in the browser and present your markup in any way you like.
CSS SYNTAX.
CSS syntax is a set rule that defines the style that should be applied to a particular element or group of elements on your web page.
Example,
h1 {
color: blue;
font-size: 2rem;
}
There are two declarations (there can be more) which are represented as pairs of properties and values.
Before the colon, color is specified and after the colon, blue is specified as the value of the property (color). This means color is a property and blue is its value, this is the same with font-size as the property and 2rem (relative size of the browser) as the value. This simple style will change how the h1 tag content appears on the browser.
CSS SELECTOR.
CSS selector is a great feature that allows the developer to style an HTML tag differently from similar tags. Imagine you have multiple "p" tags and you want to style a particular p tag, then a selector is used.
There are different types of CSS selectors, the commonly used selectors are:
- h1{property:value}, this will style all the h1 tags of a webpage.
- id="#firstP", styled as #firstP {property:value}.
- class ="secondP", styled as .secondP{property:value} selectors.
These selectors are not only used to style the HTML tags differently but they are also used to implement and call JavaScript events.
As we progress, you will use the set rule and selectors to style and implement Javascript events.
See Also: Which Screen Size Should I Develop First.
JavaScript Programming Language
JavaScript is a dynamic programming language that is well-known as the scripting language for web pages. It supports object-oriented, imperative, and declarative (functional programming) styles. Also, JavaScript's dynamic features include variable parameter lists, function variables, runtime object construction, dynamic script creation (via eval), and object introspection (via for...in and Object utilities).
In this post, you will focus on HTML DOM methods with JavaScript.
What is HTML DOM?
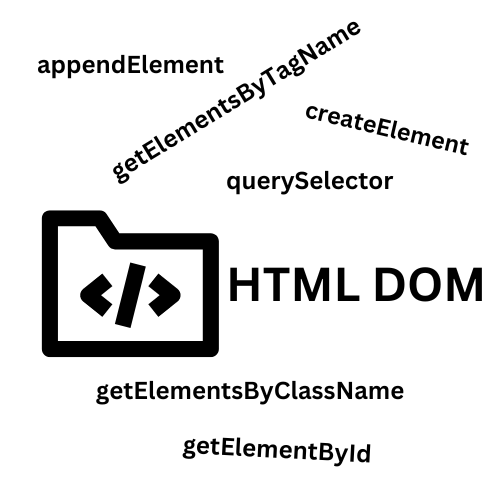
DOM (Document Object Model) displays the document as nodes and objects, allowing programming languages (JavaScript) to interact with it.
To enable JavaScript to communicate with the page, the document is represented by the DOM as nodes and objects which renders the web page as a document that can be viewed as an HTML source and is displayed in the browser window. The document can be identical in all scenarios, but it can be manipulated through the DOM representation.
You can find, access, and manipulate HTML Elements in the following ways:
- By id - (<p id="one"> document.getElementById.
- By tag name - ("p" the HTML tag) document.getElementsByTagName.
- By class name (<p class="one">) document.getElementsByClassName.
- By CSS Selectors - document.querySelector or document.querySelectorAll.
getElementById example.
This will change the content of the 1st p tag through its DOM to "My First DOM manipulation" when the web page loads.
getElementsByTagName example.
This method gets all the elements specified as the tag name(p).
elements store all the contents of the p tags. elements[0].innerHTML is used to target and change the content of the 1st p tag to "Hello World!".
getElementsByClassName example.
This method will only get the tags with the class value "learn "
In this code, elements store all the contents of the tags with ClassName = learn. elements[0].innerHTML is used to target and change the content of the 1st ClassName tag to "New Value".
Also, JavaScript can be used to style the HTML <body> tag or any other tag in the body tag.
This will change the color of the h1 element with the id "try" to blue.
You can also use Javascript to add an event to the body tag or any tag in between it.
The dynamic nature of JavaScript makes it smooth to work with and it has a very large community, even when faced with challenges these communities will come in handy to solve the challenges.
How to Start Learning Front-End with HTML, CSS, and Javascript.
In this section, you will apply all that you've learned to build your first project - The Author Card.
I believe by now, you've downloaded and installed NodeJs, and Visual Studio Code on your PC.
In your code editor, install the extension, LiveServer. If you've done that, Let's get started.
Step1
On your desktop, create a folder and name it my_profile.
Step2
Right-click on the folder and open it with the installed VSCode text editor (open with code option).
Step3
In the editor, use ctrl + ` to open the terminal and enter code index.html This will create a new file (index.html).
Step4
In the index.html file, enter this code.
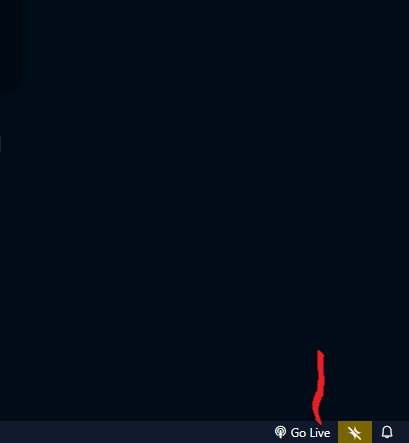
Save this file, locate "Go Live " at the right bottom of your code editor, and click it. This will start your project server and auto-run it when you make any save.
Step5
Create a CSS file (styles.css) and enter the following.
In this code
- The browser margins and paddings are set to 0px.
- The main element is styled to have a width:100% and height:100vh that takes 100% of the screen width and height. The main is also styled to center its contents and have a white background color.
- The card is styled by referencing the div by id "#card". It takes 60% of the screen width and the height resize by default. The padding is set at 16px and the card background color is white.
- #card p{}, #card h2{}, and #card button{} are CSS descendant combinators that are used to target descendant tags and style them – p, h2, and button tags accordingly.
- The ul tag is styled to have its bullet point inside.
When this is saved, the live server will rerun the local server.
Step6
In this step, you will write a JavaScript function that changes the card background color and text color.
This code should be placed after the "</main>" tag
In this code,
- The button tag is targeted using getElementById("myBtn") and likewise the div getElementById("card").
- A function clickFunc is declared, when it is triggered it changes the card text color to white and the background color to blue.
- The button element (changeBtn) is assigned to an addEventListener whose event type is "click" and triggers the clickFunc function.
When you save the file, go to the browser and click on change. This will change the text and background color.
You can play around with other colors.
Conclusion
In this post, you now know the roles of a front-end developer and the basic skills required for front-end development.
Also, you learned how to use the basic skills (HTML, CSS, HTML DOM manipulation, and Javascript) to build static and dynamic web pages.
You are encouraged to be consistent in your front-end development career by practicing more (practice makes perfect). You can find more HTML projects for practice.
You should always refer to some documentation of HTML, CSS, JavaScript, or online learning websites for future referencing and solving bugs.
If you find this post interesting, please share.